Hello everyone, Ascriptmaster back for another Deck Profile on the Dungaree series of cards. While Sealed Demon Dragon, Dungaree had little to boast for except a small destruction effect and a harmful skill that made it weaker as a Rearguard, the set Binding Force of the Black Rings gave it two well-needed buffs to keep it viable: a starter that helped mitigate its negative skill, and a crossride form that took advantage of its reliance on bound cards.
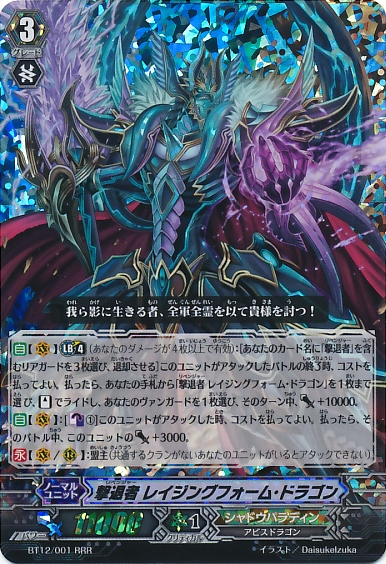
 [AUTO](VC) Limit Break 4 (This ability is active if you have four or more damage): [Counter Blast (2) & Bind the top card of your deck face up] When this unit attacks a vanguard, you may pay the cost. If you do, choose up to one of your opponent's rear-guards in the front row, retire it, and this unit gets [Power]+2000 for each «Narukami» in your bind zone until end of turn.
[CONT](VC):If you have a card named "Sealed Demon Dragon, Dungaree" in your soul, this unit gets [Power]+2000.
[CONT](VC/RC): Lord (If you have a unit without a same clan as this unit, this unit cannot attack)
|
Grade 0: 1 Exorcist Mage, Dan Dan (Starter) 4 Eradicator, Yellow Gem Carbuncle (Crit) 4 Sacred Spear Eradicator, Pollux (Crit) 4 Spark Edge Dracokid (Crit) 4 Worm Toxin Eradicator, Seiobo (Heal) |
Grade 1: 4 Eradicator Wyvern Guard, Guld 4 Red River Dragoon 2 Dragon Dancer, Agatha 2 Rising Phoenix |
|
Grade 2: 2 Demonic Dragon Berserker, Garuda 2 Dragon Dancer, Julia 2 Eradicator, Thunder Boom Dragon 3 Lightning Axe Wielding Exorcist Knight 2 Storm Bring Dragon |
Grade 3: 4 Demon Conquering Dragon, Dungaree "Unlimited" 4 Sealed Demon Dragon, Dungaree |
The basic strategy with Dungaree "Unlimited" is to accrue as many bound cards as possible to maximize the power gained from its Limit Break. This generally means taking advantage of Dan Dan's skill, which binds a card from the top of the deck every time a Dungaree unit is called to the Vanguard or Rearguard Circles. Not only that, its wording allows Sealed Demon Dragon, Dungaree to bypass its harmful skill by treating the bound card as if it were bound by Dungaree, not Dan Dan. Riding Sealed Demon Dragon, Dungaree before "Unlimited" not only gives the well sought-after Crossride defense, but also binds 2 cards when it is placed in the Vanguard circle. Since all Dungarees are Grade 3, Storm Bring Dragon also helps by allowing you to search the top five cards of the Deck for one of them every time it hits the Vanguard.
Of course, Dungaree "Unlimited" has a high Counterblast cost that makes it difficult to use more than two times in a game, so Demonic Dragon Berserker, Garuda adds pressure by threatening to unflip a damage for Dungaree "Unlimited" to use later. Dragon Dancer, Agatha also adds to the pressure by giving another Narukami Power when Dungaree "Unlimited" activates its Limit Break by capitalizing off the retiring effect, but costs Soul and limiting its usage. Rising Pheonix gives a free draw, but also works off the Soul and at times can conflict with Agatha due to the need to maintain the Crossride defense on Dungaree "Unlimited" as well. Finally, Dragon Dancer, Julia, gives some small superior call options to conserve hand while maintaining field presence early game, making it useful despite its low power.
The card images used on this site have been obtained and reposted from the Cardfight!! Vanguard Official Portal Site (http://cf-vanguard.com/), in accordance to the guidelines stated there. Re-use of these images (re-post, distribution) is strictly prohibited.
© Bushiroad All Rights Reserved.
© Bushiroad All Rights Reserved.

 [AUTO] Limit Break 4 (This ability is active if you have four or more damage): When a «Great Nature» rides this unit, choose your vanguard, and until end of turn, that unit gets [Power]+10000 and
  [AUTO](VC) Limit Break 4 (This ability is active if you have four or more damage): [Counter Blast (2)] When this unit attacks a vanguard, you may pay the cost. If you do, choose another of your «Great Nature» rear-guards, [Stand] it, and that unit gets [Power]+4000 until end of turn, and at the end of that turn, retire that unit.