Pages

Friday, March 6, 2015

Flower Maidens


Hey everyone Natsu here back with another deck profile and this week we’re going to take a look at the Neo Nectar clan that recently got a boost in the English format with the new Flower Maiden of Purity Trial Deck.  Neo Nectar was that originally started out by calling from the deck in order to gain advantage and then evolved into two separate groups.  The more heavily favorited group was the Musketeer archetype which retired cards to get other Musketeer cards in order to build up consistent fields.  The type I’ve built and am going to show today revolves around the second play style of having multiple copies of the same card in order to increase attacking power.  For THIS particular deck build I’m mainly using cards only released in the English format so cards from G set 2 are NOT included.  (For the sake of not repeating myself for this article copy means to call another of the same unit from the deck for those who may be less familiar with the game).

Grade 0
Spring-Heralding Maiden, Ozu
Heave-ho Turnip x2 (Draw)
Maiden of Dimorphotheca x4 (Critical)
Fairy Light Dragon x4 (Heal)
Maiden of Morning Glory x2 (Stand)
Maiden of Daybreak x4 (Stand)
So for our grade 0s we run the new starter Ozu who is a forerunner with a Generation Break 1 ability to Counterblast 1 and put her in soul to copy any grade 2 or less unit on your field.  This can allow you to easily help get what you need as I stated previously this Neo Nectar style is the multiple copies 
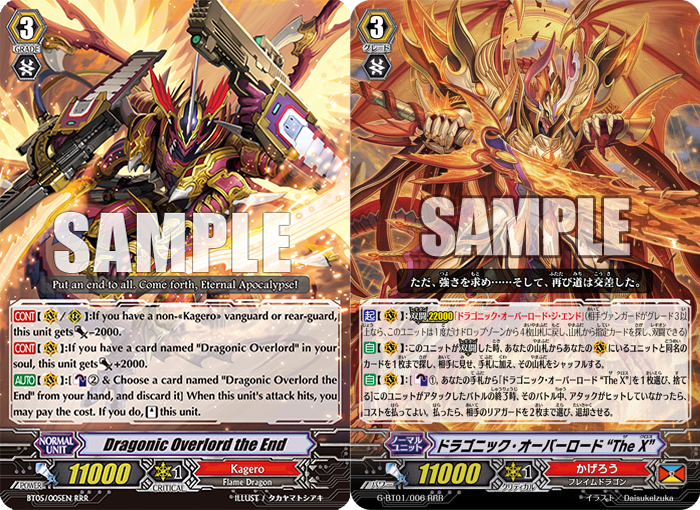
style.  Lastly we run 6 stand and 2 draw because our ace unit is a stronger version of Arbaros so our units can help take advantage of our stands since they can still push for strong numbers unboosted.

Grade 1
Maiden of Blossom Rain x3 (Perfect Guard)
Budding Maiden Diane x4
Coral Berry Squire x4
Lady of the Sunlight Forest x4

For our grade 1 line-up we run 3 of our perfect guard in order to allow space to maximize the units that we ideally will be calling, Diane is just a 8k vanilla while Squire is a new type of cookie cutter unit who is a generation break 1 10k attacker.  Lastly I run 4 Lady of the Sunlight Forest who is a rest to drop and draw.  One could run Maiden of Cherry Stone but running her requires Maiden of Cherry Bloom to who I’d rather run other grade 2 units.

 Grade 2
Maiden of Rainbow Wood x4
Maiden of Gladiolus x4
White Rose Musketeer, Alberto x3
 
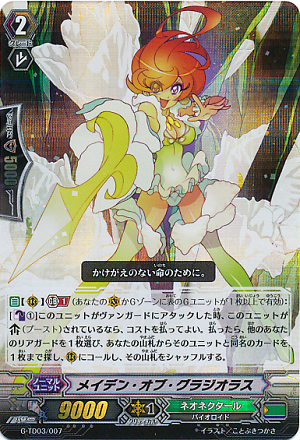
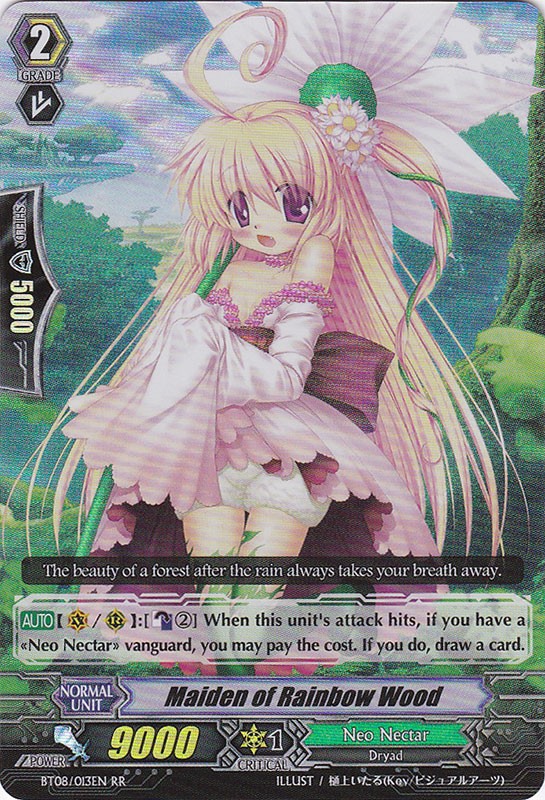
For our grade 2s I run 4 Maiden of Rainbow Wood who is an on hit counterblast 2 to draw 1 this unit is great as it allows your power ups to not just be power ups but to allow them to create pressure as you’re already going plus by copying units so your opponent will not want to allow you to generate further advantage for yourself.  Then we run 4 Maiden of Gladiolus who is a generation break 1 unit who when boosted and attacking a vanguard can clone another unit.  This is the BEST grade 2 in Neo Nectar for this style as it can help fill up your field quickly and easily.  Another good thing about this unit is that you can copy the unit that is boosting behind another copy of Gladiolus in order to help further copy units to establish your field.  Lastly we run 3 Alberto who is an on hit damage unflipper, which can help further pressure the opponent and can help make Rainbow Wood live again.

Grade 3
Deep Green Lord, Master Wisteria x3
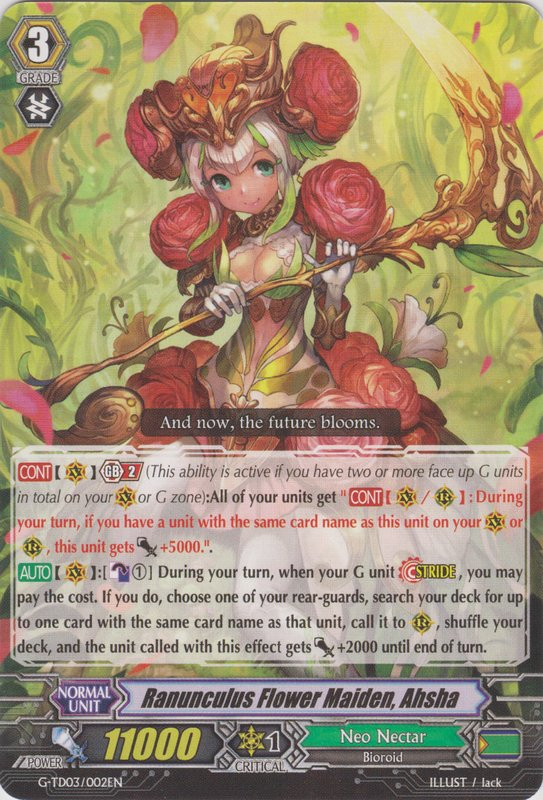
Ranunculus Flower Maiden, Ahsha x4

For our grade 3s we run 3 Wisteria who is the breakride whose breakride effect is to counteblast 1 to clone 2 units on your field.  Usually this unit is just used to pay for stride although breakriding Ahsha isn’t terrible since you can’t get a perfect field rather fast as ideally you’d clone a front and backrow unit in order to perfect your field.  Lastly is the unit that ties the whole deck together Ahsha, at generation break 2 all units that have another copy on the field get an extra 5k power effectively boosting the perfect field by 10k per column.  Also if you happen to stride over her you can counterblast 1 to clone any unit on your field helping to set up for her ability.

Grade 4
Flower Princess of Spring, Arborea x4
Harmonics Messiah x4

For our G Units we run 4 Arborea who on hit can clone any unit on field and give it 2k power allowing you to attack an extra time OR boost your already stood from a trigger unit.  Lastly we run 4 Harmonics Messiah due to the small G Unit pool.

Overall this deck is a fun deck although unfortunately can lose easily to field disruption late game as it can sometimes be difficult to re-establish wiped boards.

Friday, February 27, 2015

"Wildebeast Rampage" - Leopald Chatnoir

Hello, Ascriptmaster is back with another deck profile on Great Nature, specifically a deck tailored around Leopald Reverse and its ability to increase your rearguards' power to frightening levels, especially in conjunction with the new Generation Break cards and the inclusion of a Limit Break enabler unit to the clan.

Grade 0

Blackboard Parrot
4 Broadcast Rabbit
4 Holder Hedgehog
4 Eraser Alpaca
4 Protractor Utan

Grade 1

4 Contradiction Instructor, Shell Master
4 Coiling Duckbill
3 Paint Otter
3 Tank Mouse

Grade 2

4 Capable Assistant, Guru Wolf
4 Crayon Tiger
3 Sleepy Tapir

Grade 3

4 Honorary Professor, Chatnoir
4 School Punisher, Leo-pald "Яeverse"
2 Imperial Flame Dragon King, Route Flare Dragon
2 Interdimensional Dragon, Ragnaclock Dragon
1 Interdimensional Dragon, Fate Rider Dragon
1 Flash Flame Divine Knight, Samuil
1 Super Cosmic Hero, X Rogue
1 Eternity Professor, Phoenicialux
The battle plan for a Leopald Reverse deck is the same as always: by locking the two backrow boosters to your rearguard columns, both of your front row rearguards gain 8,000 Power, which can then result in devastating attacks, more if you elect to lock the Vanguard's booster as well. Chatnoir adds on to this pressure during the turn you break ride, by giving your units additional power as well as giving multiple draws at the end of the turn. This is made even more powerful by the deck's 8 stand triggers, as each rearguard alone has the weight of an entire column behind it, and Stand triggers can easily finish off a game. Although Great Nature now has access to 3 different stand triggers, critical triggers are still very useful in pressuring the opponent with damage.

The Grade 1 lineup is very basic for a Leopald Reverse deck. Four perfect guards are practically staple for most decks, and the new G-era guards can provide some minor unflipping support for the deck, which otherwise has none. Duckbill is a godsend as usual, since Great Nature's style of retiring units at the end of the turn allows you to draw an incredible number of cards. Tank Mouse is also required for this deck, because it rests itself to give a rearguard power, and then can be locked to boost your units further. Finally, Paint Otter allows you to trigger Limit Break early, which is especially useful for grabbing early momentum with a Break Ride.

Great Nature gained many powerful Grade 2 units that Leopald Reverse can use to great effect. Guru Wolf is the most important new card for the deck, because it creates free on-hit pressure if its column's Power is 20,000 or more when it hits the Vanguard. When Leopald Reverse locks the entire back row, Guru Wolf becomes a 21,000 Power attacker for the turn, which becomes even more powerful if it stands that turn for another pressure attack. Crayon Tiger is a new Generation Break card that stands another unit and gives it 4,000 Power if it is boosted. Although this means Leopald Reverse should not lock Crayon Tiger's booster and thus could deprive Guru Wolf of its skill during its first attack, the extra stand effect can be crucial for victory, especially if multiple Tank Mouse have been used on the other rearguard to force out more guard for that turn. However, Crayon Tiger can only be used once per turn, meaning that even if you somehow stand it and its booster, it will not be able to stand the other rearguard that turn. Sleepy Tapir doesn't have that problem, though; it functions like a Binoculous Tiger with the new Resist keyword, meaning it cannot be targeted for retiring or locking effects, and also can give extra power to the other rearguard if it stands due to a stand trigger.

For the Generation Zone, since only the Grade 3 units in the deck are affected by having a non-Great Nature Vanguard (because of Lord), I elected to tech all kinds of random G Units into the deck for their effects, even cards from different clans. Samuil is usually my go-to first Stride unit, since its ability immediately forces an extra point of damage on the opponent, making it harder to guard the multiple stand triggers in the deck. X Rogue is also an interesting tech, since its 37,000 Power requirement can be satisfied by using a Tank Mouse or Sleepy Tapir to give 4,000 Power to a standard 7,000 booster behind it, creating draw and retiring pressure. Fate Rider Dragon allows you to cycle out Coiling Duckbills that have already been used for Crayon Tigers if you need them, making it a great utility unit. Route Flare Dragon retires a column when you use its skill, which can severely disrupt an opponent's formation. Ragnaclock Dragon is usually used as a finisher, as it gains a critical and prevents the opponent from guarding with Grade 0 units. Finally, Phoenicaialux is a Great Nature G Unit that can be used if a player needs to call Grade 3 units to the field and not be restricted by Lord. While this kind of Generation Zone is illegal in Japanese tournaments, overseas formats can still mix clans in this way, allowing for these kinds of devastating combos.

Friday, February 20, 2015

What color are your flames?

Hey everyone Natsu here back with another article for you all and this week we're going to be taking a look at the newer Liberators involving the legion that came out in December of last year for the TCG.

Grade 0
Fire Passion Liberator Guido
Ketchgal Liberator x4 (Stand)
Steel Blade Liberator, Alwilla x4 (Critical)
Great Wish Liberator, Esus x4 (Critical)
Numinous Tree Liberator, Elchea x4 (Heal)

So for our starter we run Guido who when your Vanguard is in legion can put himself into soul to check your top 3 for a Liberator and call it to an open rearguard circle.  There's also the very viable Koronagal Liberator who when your vanguard is in legion acts a 5k base Bruno clone I prefer the counterblast free call from deck as Glare's extra ability also requires a counterblast unlike Core therefore counterblasts can be gone quickly sometimes.  Then we run 8 critical and 4 stand, the reason for the stand is that this stand trigger acts as a Zorron so we can increase our chances of hitting cards such as Josephus and Agolovale.


Grade 1
Fast Chase Liberator, Josephus x4
May Rain Liberator, Bruno x4
Physical Force Liberator, Zorron x4
Light Formation Liberator, Erdre x3 (Perfect Guard)

For our grade 1 lineup we run 4 Zorron to once again increase the chances of hitting Josephus as well as increase the chances of Prominence Core's ability going off.  Then we run 4 Bruno who gets an extra 3k whenever a unit is called from deck so he can be a good booster for Glare to hit magic numbers if you hit a Zorron, Oath or Ketchgal.  We then run 4 Josephus who when called from deck let's you especial soulblast 1 to draw a card allow using to give us the extra options for units and free cards that draw triggers could've given us if we ran them.  It can also help us get extra Bluish Flame units to our hand in order to use Prominence Glare's ability.  Lastly we run 3 perfect guards since quintent walls don't work well for this type of build since we run a unit that has a persona ability so we want to call our Oath and Core's from deck instead of milling them.

Grade 2
Oath Liberator, Aglovale x4
Liberator, Lawful Trumpeter x3
Regulation Liberator, Aglovale x3

For our grade 2s we run 4 of the best Liberator Grade 2 and lower card Oath Liberator Aglovale, who on call from hand or deck can counterblast 1 to check your top 3 and call a Liberator from among them.  This is also the legion mate for Prominence Core so running 4 is also ideal for Core's skill.  Then we run 3 Lawful Trumpeter who when you legion can check your top 3 for a Liberator and call it to an open rear guard circle.  This can help you get an easy +1 or even +2 when you legion and can help trigger Core and Glare's skills early on to help pressure your opponent and push them to 5 damage early on.  Lastly we run 3 Regulation Agolovale, who's the legion mate for Prominence Glare.  He's an 11k attack for the Bluish Flame sub-archetype and when he's called from deck he can soulblast 1 to check your top 5 for a Bluish Flame card and add it to your hand.  This can help if you just so happen to get him off turn 2 with his Oath counterpart or if you need that extra card for Glare's skill.

Grade 3
Bluish Flame Liberator, Prominence Core x4
Bluish Flame Liberator, Prominence Glare x4

Then lastly for our grade 3s we run 4 of each Prominence Core and Glare.  Both share the ability of counterblasting 1 and killing off a unit to check your top 4 for a liberator and calling it and then depending on if you have Core or Glare you have access to a different ability.  For Core if the unit you called from your deck (NOTE that the unit called from deck DOESN'T have to be from their ability as well) was another copy of Core or Oath Core gains an extra 3k power and 1 critical which is insane because Oath would then let you call ANOTHER unit from your deck giving you the chance to possibly get Core to 26k 3 crit unboosted.  As for Glare whenever you call ANY liberator unit from your deck you can counterblast 1 and discard ANY Bluish Flame card to make Glare gain 1 critical AND his attack can ONLY be guarded with grade 0s aside from intercepts, making him a VERY deadly finishing unit.

Overall the new Liberator support was able to give Liberators exactly what they needed which was a way to make better calls from deck, usually most Liberator players were able to fill up their fields quickly and replenish broken fields with cards such as Round Table Alfred, Garmore and Monarch Alfred or even Gancelot Zenith, however the problem with all of those cards was that you'd be calling JUST the top card of your deck therefore it could be VERY possible you'd get a field full or triggers which didn't benefit you very much and even the more skilled Gold Paladin player at best could just use this power up a Bruno or Geraint without being able to take full advantage of cards such as Josephus or even Zorron.

Friday, February 13, 2015

"Generation Broken Jewel" - Jewel Knights

Hello, everyone. Ascriptmaster is back with a deck profile on Jewel Knights, a deck Natsu covered half a year ago. As a whole, the core of the deck has not changed much: the deck still uses Ahsley Яeverse as its main unit to retire enemy units while building your own field. However, thanks to the new Stride units, a Limit Break Enabler, and also the release of Jewel Knight, Swordmy, the Jewel Knights' ability to fill their field has increased drastically while maintaining their ability to disrupt the opponent's field.
[AUTO]:[Counter Blast (1 card with "Jewel Knight" in its card name)] When this unit is placed on (RC), you may pay the cost. If you do, search your deck for up to one grade 1 or less card with "Jewel Knight" in its card name, call it to (RC), and shuffle your deck.
Friendship and trust are the power of "Jewel Knight".

Grade 0

Shining Knight, Millius
4 Burning Mane Lion
4 Blazing Jewel Knight, Rachelle
4 Jewel Knight, Noble Stinger
4 Ardent Jewel Knight, Polli

Grade 1

4 Holy Knight Guardian
4 Jewel Knight, Sabremy
3 Heat Wind Jewel Knight, Cymbeline
3 Security Jewel Knight, Alwain

Grade 2

4 Banding Jewel Knight, Miranda
4 Jewel Knight, Swordmy
3 Fellowship Jewel Knight, Tracie

Grade 3

4 Pure Heart Jewel Knight, Ashlei
4 Broken Heart Jewel Knight, Ashlei "Яeverse"

Generation Zone

4 Holy Dragon, Saint Blow Dragon
2 Shrouded Divine Knight, Gablade
1 Flash Flame Divine Knight, Samuil
1 Miracle Element, Atmos
With Swordmy's skill, it becomes incredibly easy to get units on the field, since calling it immediately searches out a booster unit to place in any column. One of the cards you can search with Swordmy is Jewel Knight, Sabremy, which allows Ashlei "Яeverse" to activate as quickly as possible. This effectively gives you 8 chances to get Sabremy on the field and speeds up the Limit Break in the deck.

Then, once Sabremy is on the field or you reach 4 damage, Swordmy can then search the other new Jewel Knight in the deck, Cymbeline. When there are 3 other Jewel Knight rearguards on the field when she is called, Cymbeline can rest herself to give any other Jewel Knight 10,000 extra power for the turn. Then, since Cymbeline will not be boosting or attacking that turn, it can be locked to activate Ashlei "Яeverse"!

Instead of leading with a Jewel Knight starter like Tiffany or Heloise, the deck uses a new Generation Break card, Shining Knight Millius. Millius makes it even easier to call a Swordmy and Sabremy to the field, and is best used the turn a G Unit Strides on Ashlei, because it sets up the Break Ride immediately for a high critical attack.

Stride helps the deck move even faster than before since it allows for high-powered attacks when it isn't convenient to use Ashlei "Яeverse"'s skill, or before Limit Break can be activated. Not only that, by discarding Ashlei to fuel Stride, it sets up Alwain's skill to give Ashlei units 5,000 extra Power when needed. Saint Blow Dragon is the main G Unit, gaining immense power and a critical against the opponent, and Gablade is the backup that allows you to search yet another unit to fill your field. Samuil is a once-off tech that deals direct damage to the opponent, similarly to Dragruler Phantom, but its Counterblast cost means it is rarely used since you want to use most of your Counterblast on Ashlei "Яeverse". Finally, Miracle Element Atmos is an emergency high-power attacker if you need one final push but can't use Saint Blow Dragon for some reason.

Friday, February 6, 2015

Eradicators


Hello everyone Natsu here back with another deck profile.  So for this week we're going to take a look at Eradicators after they received some new support allowing the deck to speed up greatly.

Grade 0
Crouching Eradicator Dragon, Linchu
Eradicator, Blue Gem Carbuncle (Draw) x4
Eradicator, Yellow Gem Carbuncle (Critical) x4
Spear of Obliteration Eradicator, Brooks (Critical) x4
Demonic Dragon Eradicator, Seibo (Heal) x4

So for our trigger line-up we run the standard 8 critical and 4 draw trigger lineup, with Linchu as our starter due to his ability to retire any grade 0 or 1 unit which can easily come in handy.
 
Grade 1                                                                                                             
Dragon Dancer, Anastasia (Perfect Guard) x4
Assault Eradicator, Saieki x3
Eradicator, Egg Helm Dracokid x3
Iron Blood Eradicator, Shuki x3
Eradicator of True Flames, Kougai x2

For our grade 1s we run 4 Anastasia who is the new perfect guard unflipper allowed us to unflip damage.  Then we run 3 Saieki to once again allow us to unflip damage as our main unit can sometimes eat up a lot of our counterblast.  Then we run 3 Egg Helm Dracokid who is the limit break enabler for Narukami.  We also run 3 Shuki who when an opposing rear guard is retired gains 3k, this allows for us to hit higher numbers off of our retires which can make attacks more pressuring.  Lastly we end our grade 1 line-up with a 10k booster to allow our vanguards to hit higher numbers.
 
Grade 2
Devil Blade Eradicator, Chouou x4
Eradicator, Sparkrain Dragon x3
Twin Gun Eradicator, Hakushou x3

For grade 2s we run 4 Chouou who on call or ride can put another Eradicator into the soul to retire an opposing front row unit.  He is in my opinion the best Narukami unit outside of grade 3 cards as he's the lowest cost retire as most other units require counterblast.  Usually you can just use a draw trigger as the cost.  It also helps give food for Saieki which can help allow for extra unflip shenanigans.  Then we run 3 Sparkrain who is the 12k attack and then 3 Hakushou who is a grade 2 version of Shuki.  He also like his grade 1 counterpart is there to help hit higher numbers and when paired with his grade 1 allows each column to rise by 6k per retire.
 
Grade 3
Eradicator, Gauntlet Buster Dragon x4
Eradicator, Ignition Dragon x4

Lastly for our grade 3s we run 4 of each Gauntlet and Ignition Dragons.  Ignition is a breakride who at a cost of counterblasting 1 retires 2 rearguards of your opponents choice.  While there is the downside of your opponent choosing thankfully the card you should be breakriding Gauntlet Buster doesn't care as ANY retire gives him an extra 3k power and 1 critical.  He can also especial counterblast 2 to allow your opponent to retire a rearguard of their choosing.  Mainly you want to use your retires to have Gauntlet Buster attack with 2-3 critical every turn which can effectively limit your opponent's counterblast options as well as if they don't have a limit break enabler lock them out of limit break.  Overall this deck is VERY strong and can easily overwhelm many opponents, the only difficulties with the deck can be knowing how many criticals you should stack onto your Gauntlet Buster as there is always the chance the opponent could have a perfect guard making all of your efforts go to waste.

Friday, January 30, 2015

"Cruel Seal Stride" - Cruel Dragon

Hello everyone, Ascriptmaster back with another deck profile. This week we are covering one of the first decks I profiled on the Team Fairy Tail blog, a deck focused on Cruel Dragon with Seal Dragon support for extra retiring. With the introduction of Stride and Generation Break, the deck has become much faster at retiring opposing units and disrupting their plays.
[AUTO](VC) Limit Break 4 (This ability is active if you have four or more damage):[Counter Blast (1) & Soul Blast (1)] When this unit attacks a vanguard, you may pay the cost. If you do, choose one of your opponent's grade 2 or less rear-guards, and retire it.
[ACT](Hand):[Reveal this card, choose your grade 2 or greater «Kagerō» vanguard, and [Rest] it] During the main phase of that turn, if your opponent's rear-guard is put into the drop zone, ride this card as [Stand], choose your vanguard, and that unit gets [Power]-3000 until end of turn.
[CONT](VC/RC): Lord (If you have a unit without a same clan as this unit, this unit cannot attack)

Grade 0

Seal Dragon, Terrycloth
4 Seal Dragon, Biella
4 Lizard Soldier, Goraha
4 Gatling Claw Dragon
4 Seal Dragon, Shirting

Grade 1

4 Protect Orb Dragon
4 Seal Dragon Spirit, Malkibel
3 Seal Dragon, Kersey
3 Flame of Strength, Aetniki

Grade 2

4 Twilight Arrow Dragon
4 Perdition Dragon, Dragonic Neoflame
3 Seal Dragon, Corduroy

Grade 3

4 Cruel Dragon
2 Double Perish Dragon
2 Seal Dragon, Georgette

Generation Zone

4 Imperial Flame Dragon King, Route Flare Dragon
3 Divine Dragon Knight, Mahmoud
1 Miracle Element, Atmos
Thanks to all the Stride support and a Limit Break Enabler card, Cruel Dragon is bigger, faster, and stronger than ever before. When Malkibel hits the field, Cruel Dragon is free to unleash its powerful retiring skills from the instant you ride it. This makes it very advantageous to superior ride the card using its own skill, as you gain an early drive check and an early retire. However, be careful using this when going second, as it could allow your opponent to Stride first! Regardless, the ability to start clearing the field from early game is a massive boon. Aetniki's skill moves it to the Soul when a unit is retired by your card effects to turn two cards in your Damage Zone face-up, granting Cruel Dragon additional Counterblast and Soul for its skill.

In order to back up the destructive presence of Cruel Dragon, every Grade 2 in the deck has a skill relating to retiring units. Corduroy returns to the deck as a supporting card to retire important back row units and trigger Cruel Dragon's superior ride as necessary, and make it easier to activate Seal Dragon Terrycloth's skill as well. Twilight Arrow Dragon is a new Generation Break card that can retire Grade 2 or lower units when it attacks; while it cannot trigger Cruel Dragon's superior ride, it is incredibly useful since it only costs Counterblast 1 and acts well as a complement to Cruel Dragon. Finally, Dragonic Neoflame adds to the destruction by chaining to your other retiring skills to eliminate even more units.

The Grade 3 lineup for the deck has changed drastically due to how the deck structures. With Malkibel allowing earlier retiring with Cruel Dragon's skill, using Dauntless Drive Dragon to allow Cruel Dragon to retire two units in one turn is no longer as powerful as it once was, since you no longer have to wait until 4 damage to use Cruel Dragon. Instead, Double Perish Dragon acts as the main backup Vanguard, since it retires a Grade 1 unit on-ride, and also has a Generation Break that allows it to retire units (albeit more expensive than Cruel Dragon's). In addition, Seal Dragon, Georgette is used as a tech because its Lock Break skill can disrupt Link Jokers when needed, and it has a decent power-up skill to maintain an offensive presence.

The G Unit lineup for the deck is very standard for a Kagero deck. Route Flare Dragon is the ace G Unit, retiring entire columns when it appears on the field, but it needs a face-up unit in the G Zone to use the first time. As such, Mahmoud is usually the first go-to unit to Stride, since its appearance early-game will force the opponent to consider blocking the heavy attack while at low damage or lose one of their units. Atmos is usually played last as a finisher if needed, as its skill allows it to immediately rise to 36,000 unboosted, an almost guaranteed death sentence if the opponent does not have a Perfect Guard in their hand.

To be honest, there are still many changes I could have made to the deck by removing most of the Seal Dragons and replacing them with new cards, but I wanted to stay true to the original themes for the deck by including them, which still allows for the Superior Ride of Cruel Dragon early game consistently thanks to Terrycloth's skill. Removing Seal Dragons like Kersey and Corduroy opens up options for other destructive cards that are available to Kageros, such as Lava Flow Dragon to access Stride more consistently, Dragon Knight Sadegh to retire more units, or Dragon Knight Javad as a powerful attacker. There are many options available to players who want to use Cruel Dragon, so just mix and match to see what works for you.

Friday, January 23, 2015

Dragonic Overlord The X

Hey everyone Natsu of Team Fairy Tail FINALLY back with another article.  Since we've last updated A LOT of new cards have come out and the meta has changed drastically so today we're going to take a look at one of the top two decks in today's meta and my version of the build Dragonic Overlord The X.

Grade 0
Dragon Knight, Sadegh x1
Gattling Claw Dragon x4 (Draw)
Embodiment of Spear, Tahr x4 (Critical)
Blue Ray Dracokid x4 (Critical)
Perdition Dancer, Agafia x4 (Heal)

So for the starter I chose to run Sadegh over the very popular Red Pulse in order to increase the amount of retires in the deck. The deck has 22 retire cards not counting Sadegh so getting his effect off isn't particularly hard, although Red Pulse is by no means a bad choice if you chose to run this deck.  The rest of the lineup is pretty standard with the 8 critical and 4 draw to help you get copies of Overlords with draw power while at the same time providing you a way to get rid of starters early game.

Grade 1
Protect Orb Dragon x4 (Perfect Guard)
Demonic Dragon Mage Kimnara x4
Dragon Monk, Gojo x4
Lizard Soldier Grom x3

For our grade 1s we run 4 of the new perfect guard which allows you to unflip a counterblast provided you have a copy in your drop zone.  This can come in handy very easily as this deck can eat up a lot of your counterblasts.  Next we run Kimnara who in my personal opinion is the BEST grade 1 in Kagero who can counterblast 1 and move himself to the soul to retire an opposing grade 1.  This can get rid of any annoying boosters and also gives you fuel for your soul since this deck also can find itself using up the soul quite a bit.  We also run 4 of Gojo who can rest himself to allow you to drop 1 card and draw a new one, he's great early game to help you filter out extra Gatling Claw Dragons as well as help you reach legion as quickly as possible. He also has use late game since he can help you filter out dead copies of The End as well as since your opponent isn't very likely to allow your Vanguard to hit late game unless that hit will kill them.  Lastly we run 3 Grom who on call soul blasts 2 to unflip 2; although he's only a 5k unit you can usually just stick him behind a Burning Horn or your vanguard to compensate and the ability to make The End ready to use again is WELL worth it.

Grade 2
Burning Horn Dragon x3
Dragonic Burnout x3
Perdition Dragon, Dragonic Neoflame x3

For our grade 2s we run 3 of each Burning Horn, Burnout and Neoflame.  Burnout is a 12k attacker when your Vanguard is an Overlord so he can help compensate for Grom and can hit any uncrossridden Vanguard on his own.  Burnout let's you put any of your Overlords on the bottom of your deck and then soulblasts one to retire any opposing rearguard front or backrow, which combos really well with Dragonic Neoflame who on the turn he's called allows you to counterblast one to retire an opposing unit in the same column as him.  This 2 cards combined with Sadegh can easily crack a strong field.

Grade 3
Dragonic Overlord The X x4
Dragonic Overlord The End x3
Perdition Emperor Dragon, Dragonic Overlord the Great x2

For our grade 3s we run 4 of The X who legions with The End for a massive 2200k base on your turn.  Also when you legion you can search either a copy of The End of The X to your hand allowing you access to the persona blast of your choosing.  The X when he DOESN'T hit can counterblast 1 and persona blast to kill two of your opponents rearguards.  This creates a lose lose situation as The End on hit counterblasts 2 and persona blasts to restand.  For this build I only run 3 copies of The End as I feel 4 is too cloggy and it's VERY rare to get his effect off more than twice in a game and even then getting it off twice in a game isn't something that happens all too often.  I then chose to run 2 copies of Overlord The Great as he can help give end game pressure for when you've run out of copies of The X by having a constant re-standing Vanguard.

G Units
Divine Dragon Knight, Mahmoud x4
Imperial Flame Dragon King, Route Flare Dragon x4

For the G Units I run 4 of both Kagero G Units.  While the G Assist can help out you usually don't need to go into either of these units as if you can ride The X then you should be riding it.  Although I've honestly NEVER used them EVER, but they can work for decent pressure if you have to ride The End.

Overall the new Kagero cards are GREAT as they create a way to constantly cripple fields while at the same time pressuring the opponents Vanguard, creating the lose lose situation and then having a vanguard that restands every turn, although one could just chose not to play rear guards this strategy is usually rather lackluster since the opponent then only gets 1 attack allowing the Kagero player to only guard with 2-3 cards while the opponent will be using 4-6 each turn.