Pages

Friday, February 13, 2015

"Generation Broken Jewel" - Jewel Knights

Hello, everyone. Ascriptmaster is back with a deck profile on Jewel Knights, a deck Natsu covered half a year ago. As a whole, the core of the deck has not changed much: the deck still uses Ahsley Яeverse as its main unit to retire enemy units while building your own field. However, thanks to the new Stride units, a Limit Break Enabler, and also the release of Jewel Knight, Swordmy, the Jewel Knights' ability to fill their field has increased drastically while maintaining their ability to disrupt the opponent's field.
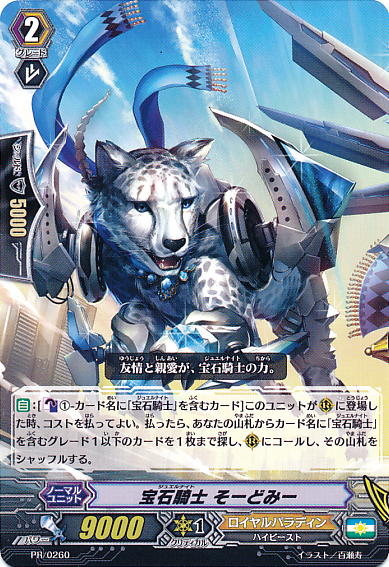
[AUTO]:[Counter Blast (1 card with "Jewel Knight" in its card name)] When this unit is placed on (RC), you may pay the cost. If you do, search your deck for up to one grade 1 or less card with "Jewel Knight" in its card name, call it to (RC), and shuffle your deck.
Friendship and trust are the power of "Jewel Knight".

Grade 0

Shining Knight, Millius
4 Burning Mane Lion
4 Blazing Jewel Knight, Rachelle
4 Jewel Knight, Noble Stinger
4 Ardent Jewel Knight, Polli

Grade 1

4 Holy Knight Guardian
4 Jewel Knight, Sabremy
3 Heat Wind Jewel Knight, Cymbeline
3 Security Jewel Knight, Alwain

Grade 2

4 Banding Jewel Knight, Miranda
4 Jewel Knight, Swordmy
3 Fellowship Jewel Knight, Tracie

Grade 3

4 Pure Heart Jewel Knight, Ashlei
4 Broken Heart Jewel Knight, Ashlei "Яeverse"

Generation Zone

4 Holy Dragon, Saint Blow Dragon
2 Shrouded Divine Knight, Gablade
1 Flash Flame Divine Knight, Samuil
1 Miracle Element, Atmos
With Swordmy's skill, it becomes incredibly easy to get units on the field, since calling it immediately searches out a booster unit to place in any column. One of the cards you can search with Swordmy is Jewel Knight, Sabremy, which allows Ashlei "Яeverse" to activate as quickly as possible. This effectively gives you 8 chances to get Sabremy on the field and speeds up the Limit Break in the deck.

Then, once Sabremy is on the field or you reach 4 damage, Swordmy can then search the other new Jewel Knight in the deck, Cymbeline. When there are 3 other Jewel Knight rearguards on the field when she is called, Cymbeline can rest herself to give any other Jewel Knight 10,000 extra power for the turn. Then, since Cymbeline will not be boosting or attacking that turn, it can be locked to activate Ashlei "Яeverse"!

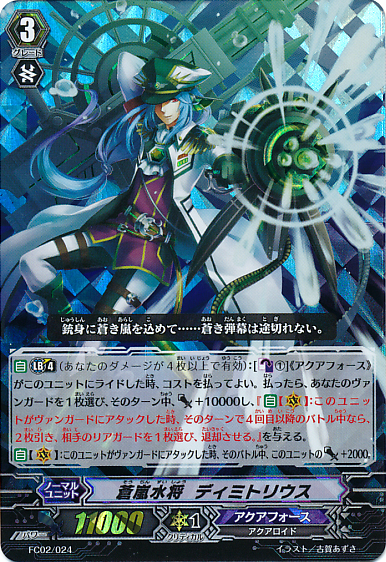
Instead of leading with a Jewel Knight starter like Tiffany or Heloise, the deck uses a new Generation Break card, Shining Knight Millius. Millius makes it even easier to call a Swordmy and Sabremy to the field, and is best used the turn a G Unit Strides on Ashlei, because it sets up the Break Ride immediately for a high critical attack.

Stride helps the deck move even faster than before since it allows for high-powered attacks when it isn't convenient to use Ashlei "Яeverse"'s skill, or before Limit Break can be activated. Not only that, by discarding Ashlei to fuel Stride, it sets up Alwain's skill to give Ashlei units 5,000 extra Power when needed. Saint Blow Dragon is the main G Unit, gaining immense power and a critical against the opponent, and Gablade is the backup that allows you to search yet another unit to fill your field. Samuil is a once-off tech that deals direct damage to the opponent, similarly to Dragruler Phantom, but its Counterblast cost means it is rarely used since you want to use most of your Counterblast on Ashlei "Яeverse". Finally, Miracle Element Atmos is an emergency high-power attacker if you need one final push but can't use Saint Blow Dragon for some reason.

Friday, February 6, 2015

Eradicators


Hello everyone Natsu here back with another deck profile.  So for this week we're going to take a look at Eradicators after they received some new support allowing the deck to speed up greatly.

Grade 0
Crouching Eradicator Dragon, Linchu
Eradicator, Blue Gem Carbuncle (Draw) x4
Eradicator, Yellow Gem Carbuncle (Critical) x4
Spear of Obliteration Eradicator, Brooks (Critical) x4
Demonic Dragon Eradicator, Seibo (Heal) x4

So for our trigger line-up we run the standard 8 critical and 4 draw trigger lineup, with Linchu as our starter due to his ability to retire any grade 0 or 1 unit which can easily come in handy.
 
Grade 1                                                                                                             
Dragon Dancer, Anastasia (Perfect Guard) x4
Assault Eradicator, Saieki x3
Eradicator, Egg Helm Dracokid x3
Iron Blood Eradicator, Shuki x3
Eradicator of True Flames, Kougai x2

For our grade 1s we run 4 Anastasia who is the new perfect guard unflipper allowed us to unflip damage.  Then we run 3 Saieki to once again allow us to unflip damage as our main unit can sometimes eat up a lot of our counterblast.  Then we run 3 Egg Helm Dracokid who is the limit break enabler for Narukami.  We also run 3 Shuki who when an opposing rear guard is retired gains 3k, this allows for us to hit higher numbers off of our retires which can make attacks more pressuring.  Lastly we end our grade 1 line-up with a 10k booster to allow our vanguards to hit higher numbers.
 
Grade 2
Devil Blade Eradicator, Chouou x4
Eradicator, Sparkrain Dragon x3
Twin Gun Eradicator, Hakushou x3

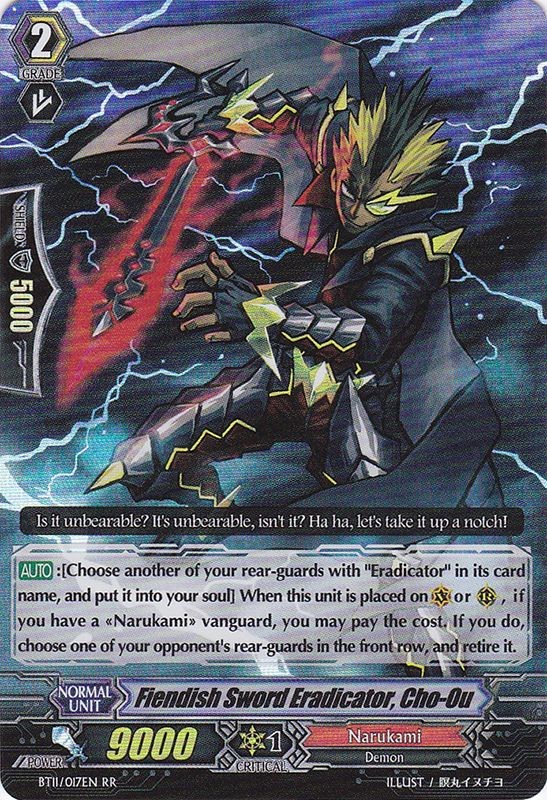
For grade 2s we run 4 Chouou who on call or ride can put another Eradicator into the soul to retire an opposing front row unit.  He is in my opinion the best Narukami unit outside of grade 3 cards as he's the lowest cost retire as most other units require counterblast.  Usually you can just use a draw trigger as the cost.  It also helps give food for Saieki which can help allow for extra unflip shenanigans.  Then we run 3 Sparkrain who is the 12k attack and then 3 Hakushou who is a grade 2 version of Shuki.  He also like his grade 1 counterpart is there to help hit higher numbers and when paired with his grade 1 allows each column to rise by 6k per retire.
 
Grade 3
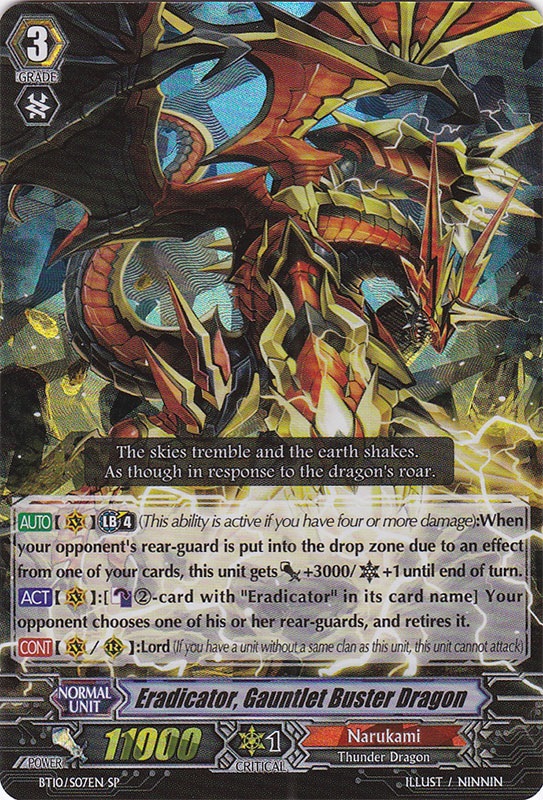
Eradicator, Gauntlet Buster Dragon x4
Eradicator, Ignition Dragon x4

Lastly for our grade 3s we run 4 of each Gauntlet and Ignition Dragons.  Ignition is a breakride who at a cost of counterblasting 1 retires 2 rearguards of your opponents choice.  While there is the downside of your opponent choosing thankfully the card you should be breakriding Gauntlet Buster doesn't care as ANY retire gives him an extra 3k power and 1 critical.  He can also especial counterblast 2 to allow your opponent to retire a rearguard of their choosing.  Mainly you want to use your retires to have Gauntlet Buster attack with 2-3 critical every turn which can effectively limit your opponent's counterblast options as well as if they don't have a limit break enabler lock them out of limit break.  Overall this deck is VERY strong and can easily overwhelm many opponents, the only difficulties with the deck can be knowing how many criticals you should stack onto your Gauntlet Buster as there is always the chance the opponent could have a perfect guard making all of your efforts go to waste.

Friday, January 30, 2015

"Cruel Seal Stride" - Cruel Dragon

Hello everyone, Ascriptmaster back with another deck profile. This week we are covering one of the first decks I profiled on the Team Fairy Tail blog, a deck focused on Cruel Dragon with Seal Dragon support for extra retiring. With the introduction of Stride and Generation Break, the deck has become much faster at retiring opposing units and disrupting their plays.
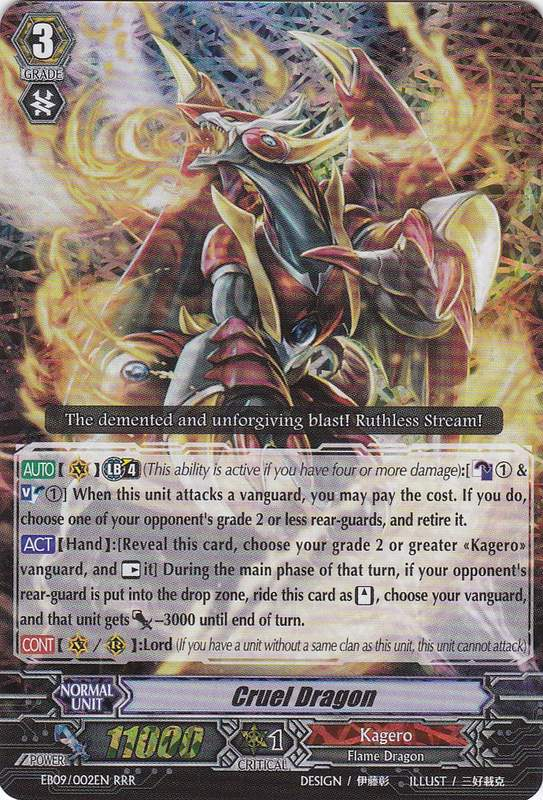
[AUTO](VC) Limit Break 4 (This ability is active if you have four or more damage):[Counter Blast (1) & Soul Blast (1)] When this unit attacks a vanguard, you may pay the cost. If you do, choose one of your opponent's grade 2 or less rear-guards, and retire it.
[ACT](Hand):[Reveal this card, choose your grade 2 or greater «Kagerō» vanguard, and [Rest] it] During the main phase of that turn, if your opponent's rear-guard is put into the drop zone, ride this card as [Stand], choose your vanguard, and that unit gets [Power]-3000 until end of turn.
[CONT](VC/RC): Lord (If you have a unit without a same clan as this unit, this unit cannot attack)

Grade 0

Seal Dragon, Terrycloth
4 Seal Dragon, Biella
4 Lizard Soldier, Goraha
4 Gatling Claw Dragon
4 Seal Dragon, Shirting

Grade 1

4 Protect Orb Dragon
4 Seal Dragon Spirit, Malkibel
3 Seal Dragon, Kersey
3 Flame of Strength, Aetniki

Grade 2

4 Twilight Arrow Dragon
4 Perdition Dragon, Dragonic Neoflame
3 Seal Dragon, Corduroy

Grade 3

4 Cruel Dragon
2 Double Perish Dragon
2 Seal Dragon, Georgette

Generation Zone

4 Imperial Flame Dragon King, Route Flare Dragon
3 Divine Dragon Knight, Mahmoud
1 Miracle Element, Atmos
Thanks to all the Stride support and a Limit Break Enabler card, Cruel Dragon is bigger, faster, and stronger than ever before. When Malkibel hits the field, Cruel Dragon is free to unleash its powerful retiring skills from the instant you ride it. This makes it very advantageous to superior ride the card using its own skill, as you gain an early drive check and an early retire. However, be careful using this when going second, as it could allow your opponent to Stride first! Regardless, the ability to start clearing the field from early game is a massive boon. Aetniki's skill moves it to the Soul when a unit is retired by your card effects to turn two cards in your Damage Zone face-up, granting Cruel Dragon additional Counterblast and Soul for its skill.

In order to back up the destructive presence of Cruel Dragon, every Grade 2 in the deck has a skill relating to retiring units. Corduroy returns to the deck as a supporting card to retire important back row units and trigger Cruel Dragon's superior ride as necessary, and make it easier to activate Seal Dragon Terrycloth's skill as well. Twilight Arrow Dragon is a new Generation Break card that can retire Grade 2 or lower units when it attacks; while it cannot trigger Cruel Dragon's superior ride, it is incredibly useful since it only costs Counterblast 1 and acts well as a complement to Cruel Dragon. Finally, Dragonic Neoflame adds to the destruction by chaining to your other retiring skills to eliminate even more units.

The Grade 3 lineup for the deck has changed drastically due to how the deck structures. With Malkibel allowing earlier retiring with Cruel Dragon's skill, using Dauntless Drive Dragon to allow Cruel Dragon to retire two units in one turn is no longer as powerful as it once was, since you no longer have to wait until 4 damage to use Cruel Dragon. Instead, Double Perish Dragon acts as the main backup Vanguard, since it retires a Grade 1 unit on-ride, and also has a Generation Break that allows it to retire units (albeit more expensive than Cruel Dragon's). In addition, Seal Dragon, Georgette is used as a tech because its Lock Break skill can disrupt Link Jokers when needed, and it has a decent power-up skill to maintain an offensive presence.

The G Unit lineup for the deck is very standard for a Kagero deck. Route Flare Dragon is the ace G Unit, retiring entire columns when it appears on the field, but it needs a face-up unit in the G Zone to use the first time. As such, Mahmoud is usually the first go-to unit to Stride, since its appearance early-game will force the opponent to consider blocking the heavy attack while at low damage or lose one of their units. Atmos is usually played last as a finisher if needed, as its skill allows it to immediately rise to 36,000 unboosted, an almost guaranteed death sentence if the opponent does not have a Perfect Guard in their hand.

To be honest, there are still many changes I could have made to the deck by removing most of the Seal Dragons and replacing them with new cards, but I wanted to stay true to the original themes for the deck by including them, which still allows for the Superior Ride of Cruel Dragon early game consistently thanks to Terrycloth's skill. Removing Seal Dragons like Kersey and Corduroy opens up options for other destructive cards that are available to Kageros, such as Lava Flow Dragon to access Stride more consistently, Dragon Knight Sadegh to retire more units, or Dragon Knight Javad as a powerful attacker. There are many options available to players who want to use Cruel Dragon, so just mix and match to see what works for you.

Friday, January 23, 2015

Dragonic Overlord The X

Hey everyone Natsu of Team Fairy Tail FINALLY back with another article.  Since we've last updated A LOT of new cards have come out and the meta has changed drastically so today we're going to take a look at one of the top two decks in today's meta and my version of the build Dragonic Overlord The X.

Grade 0
Dragon Knight, Sadegh x1
Gattling Claw Dragon x4 (Draw)
Embodiment of Spear, Tahr x4 (Critical)
Blue Ray Dracokid x4 (Critical)
Perdition Dancer, Agafia x4 (Heal)

So for the starter I chose to run Sadegh over the very popular Red Pulse in order to increase the amount of retires in the deck. The deck has 22 retire cards not counting Sadegh so getting his effect off isn't particularly hard, although Red Pulse is by no means a bad choice if you chose to run this deck.  The rest of the lineup is pretty standard with the 8 critical and 4 draw to help you get copies of Overlords with draw power while at the same time providing you a way to get rid of starters early game.

Grade 1
Protect Orb Dragon x4 (Perfect Guard)
Demonic Dragon Mage Kimnara x4
Dragon Monk, Gojo x4
Lizard Soldier Grom x3

For our grade 1s we run 4 of the new perfect guard which allows you to unflip a counterblast provided you have a copy in your drop zone.  This can come in handy very easily as this deck can eat up a lot of your counterblasts.  Next we run Kimnara who in my personal opinion is the BEST grade 1 in Kagero who can counterblast 1 and move himself to the soul to retire an opposing grade 1.  This can get rid of any annoying boosters and also gives you fuel for your soul since this deck also can find itself using up the soul quite a bit.  We also run 4 of Gojo who can rest himself to allow you to drop 1 card and draw a new one, he's great early game to help you filter out extra Gatling Claw Dragons as well as help you reach legion as quickly as possible. He also has use late game since he can help you filter out dead copies of The End as well as since your opponent isn't very likely to allow your Vanguard to hit late game unless that hit will kill them.  Lastly we run 3 Grom who on call soul blasts 2 to unflip 2; although he's only a 5k unit you can usually just stick him behind a Burning Horn or your vanguard to compensate and the ability to make The End ready to use again is WELL worth it.

Grade 2
Burning Horn Dragon x3
Dragonic Burnout x3
Perdition Dragon, Dragonic Neoflame x3

For our grade 2s we run 3 of each Burning Horn, Burnout and Neoflame.  Burnout is a 12k attacker when your Vanguard is an Overlord so he can help compensate for Grom and can hit any uncrossridden Vanguard on his own.  Burnout let's you put any of your Overlords on the bottom of your deck and then soulblasts one to retire any opposing rearguard front or backrow, which combos really well with Dragonic Neoflame who on the turn he's called allows you to counterblast one to retire an opposing unit in the same column as him.  This 2 cards combined with Sadegh can easily crack a strong field.

Grade 3
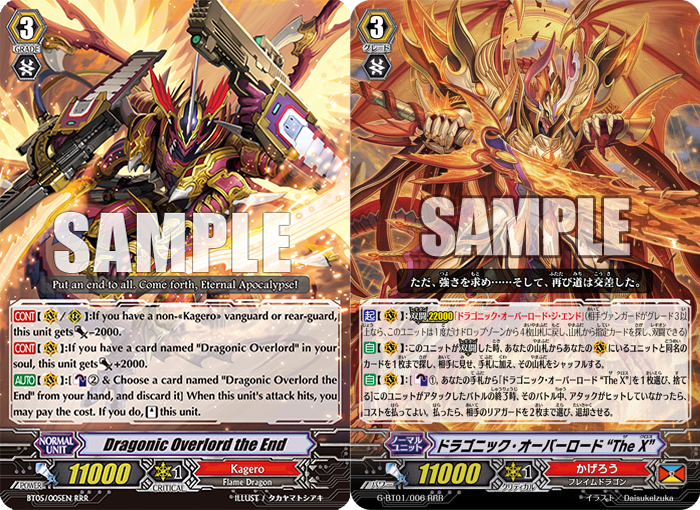
Dragonic Overlord The X x4
Dragonic Overlord The End x3
Perdition Emperor Dragon, Dragonic Overlord the Great x2

For our grade 3s we run 4 of The X who legions with The End for a massive 2200k base on your turn.  Also when you legion you can search either a copy of The End of The X to your hand allowing you access to the persona blast of your choosing.  The X when he DOESN'T hit can counterblast 1 and persona blast to kill two of your opponents rearguards.  This creates a lose lose situation as The End on hit counterblasts 2 and persona blasts to restand.  For this build I only run 3 copies of The End as I feel 4 is too cloggy and it's VERY rare to get his effect off more than twice in a game and even then getting it off twice in a game isn't something that happens all too often.  I then chose to run 2 copies of Overlord The Great as he can help give end game pressure for when you've run out of copies of The X by having a constant re-standing Vanguard.

G Units
Divine Dragon Knight, Mahmoud x4
Imperial Flame Dragon King, Route Flare Dragon x4

For the G Units I run 4 of both Kagero G Units.  While the G Assist can help out you usually don't need to go into either of these units as if you can ride The X then you should be riding it.  Although I've honestly NEVER used them EVER, but they can work for decent pressure if you have to ride The End.

Overall the new Kagero cards are GREAT as they create a way to constantly cripple fields while at the same time pressuring the opponents Vanguard, creating the lose lose situation and then having a vanguard that restands every turn, although one could just chose not to play rear guards this strategy is usually rather lackluster since the opponent then only gets 1 attack allowing the Kagero player to only guard with 2-3 cards while the opponent will be using 4-6 each turn.

Friday, November 14, 2014

"Here Comes the Sun" - Amaterasu and Ohirume

For a long time, the crossride of CEO Amaterasu has been ridiculed for its mediocre Limit Break, to the point that its existence is ignored. Goddess of the Sun, Amaterasu needed to hit to activate its skill, but the Limit Break meant that it would not be available until the opponent was at a point that the attack would be guarded regardless, or its owner was at a huge disadvantage and would have trouble making use of its minimal gains. It seemed as if its only advantage was its 13,000 defense, but without any offensive presence, a deck focused on it would be hard-pressed to win games.

However, the Amaterasu deck has gained the offensive presence it has needed thanks to the new Oracle Think Tank Legion, Goddess of the Treasure Mirror, Ohirume. Moreover, an Amaterasu deck still has access to the powerful draw power in Oracle Think Tank, and can still take advantage of these cards to keep up the formidable defenses that come with a crossride deck. This allows the deck to maintain a good offense and defense makes it a formidable threat.

Hover over a picture to show its card effect

Goddess of the Treasured Mirror, Ohirume

[ACT](VC): Legion 21000 "CEO Amaterasu" (If your opponent's vanguard is grade 3 or greater, this unit may return four cards from your drop zone into your deck once, search your deck for the specified card, and Legion)
[ACT](VC):[Counter Blast (1)] If this unit is Legion, declare a card name, and reveal the top card of your deck. If the revealed card is the card you declared, Soul Charge (2), choose up to two cards from your damage zone, and turn them face up. Then, if the revealed card has the same name as a unit on your (VC), draw two cards. This ability cannot be used for the rest of that turn.

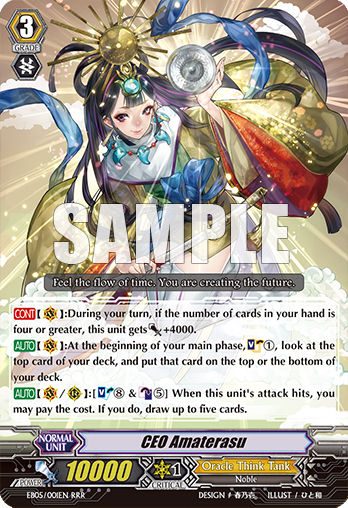
CEO Amaterasu

[CONT](VC):During your turn, if the number of cards in your hand is four or greater, this unit gets [Power]+4000.
[AUTO](VC):At the beginning of your main phase, Soul Charge (1), look at the top card of your deck, and put that card on the top or the bottom of your deck.
[AUTO](VC/RC):[Soul Blast (8) & Counter Blast (5)] When this unit's attack hits, you may pay the cost. If you do, draw up to five cards.

Goddess of the Sun, Amaterasu

[AUTO](VC) Limit Break 4 (This ability is active if you have four or more damage):[Counter Blast (2)] When this unit's attack hits a vanguard, you may pay the cost. If you do, search your deck for up to one «Oracle Think Tank», reveal it to your opponent, put it into your hand, and shuffle your deck.
[CONT](VC):If you have a card named "CEO Amaterasu" in your soul, this unit gets [Power]+2000.
[CONT](VC/RC): Lord (If you have a unit without a same clan as this unit, this unit cannot attack)

Grade 0

Battle Sister, Eclair
4 Psychic Bird
4 Battle Sister, Assam
4 Emergency Alarmer
4 Sphere Magus

Grade 1

4 Battle Sister, Chocolat
4 Battle Sister, Lollipop
4 Oracle Guardian, Gemini
2 Weather Girl, Milk

Grade 2

4 Battle Deity, Susanoo
4 Maiden of Libra
3 Blue Scale Deer

Grade 3

3 Goddess of the Treasured Mirror, Ohirume
3 Goddess of the Sun, Amaterasu
2 CEO Amaterasu
The primary focus of the deck is to take advantage of the draw abilities in Oracle Think Tank. Maiden of Libra and Blue Scale Deer both allow the user to draw more cards when they hit, setting up pressure against the opponent that is amplified by the addition of 8 Stand Triggers. Both cards rely on different things to function and therefore rarely overlap. Their costs are mitigated even further by Ohirume's skill, which can effectively flip a damage face-up and Soulcharge, especially since the divination is guaranteed by CEO Amaterasu's skill, which also activates when it is the Legion Mate. Ohirume's skill can also set up for Amaterasu's Megablast skill, but it should not be a skill to aim for; Ohirume cannot use her skill once all the Counterblast is filled up and the rest of the game will be limited.

Goddess of the Sun, Amaterasu helps out the deck even more by helping you conserve guard with its 13,000 base power during the opponents' turn, allowing you to conserve guard from the many incoming attacks. It is an excellent followup ride after Ohirume, since CEO Amaterasu will be readily available due to Ohirume entering Legion, granting additional defense to bunker down for the grind game. If a situation occurs where Goddess of the Sun, Amaterasu must be played first, do not fret too much, as Battle Sister, Lollipop's skill can allow for an early Limit Break that can search out a Perfect Guard or even Ohirume to ride next turn. Eclair also helps mitigate this problem by giving an extra chance for a favorable Grade 3 to ride.

Overall, the Amaterasu deck is very fun to play, and the multiple draw skills can make it very frustrating for an opponent as they struggle to break through your mounting defenses and you whittle down the opponent's resources with your mix of critical and stand triggers. Try it out! It just might surprise you how effective it is.

Friday, October 17, 2014

"Turbulent Whirlpool" - Blue Storm Dragon, Maelstrom

Hello everyone, Ascriptmaster back with another Cardfight!! Vanguard deck profile. This deck focuses on the Maelstrom series in Aqua Force and how their playstyle has changed and improved since Fighter's Collection 2014, specifically with the addition of a new Break Ride and the "Limit Break Enabler" cards to allow the deck a faster and more disruptive playstyle.

Hover over a picture to show its card effect

Blue Storm Marine General, Demetrius

[AUTO] Limit Break 4 (This ability is active if you have four or more damage):[Counter Blast (1)] When an «Aqua Force» rides this unit, you may pay the cost. If you do, choose your vanguard, and until end of turn, that unit gets [Power]+10000, and [AUTO](VC):When this unit attacks a vanguard, if it is the fourth battle of that turn or more, draw two cards, choose one of your opponent's rear-guards, and retire it.".
[AUTO](VC):When this unit attacks a vanguard, this unit gets [Power]+2000 until end of that battle.

Blue Storm Dragon, Maelstrom

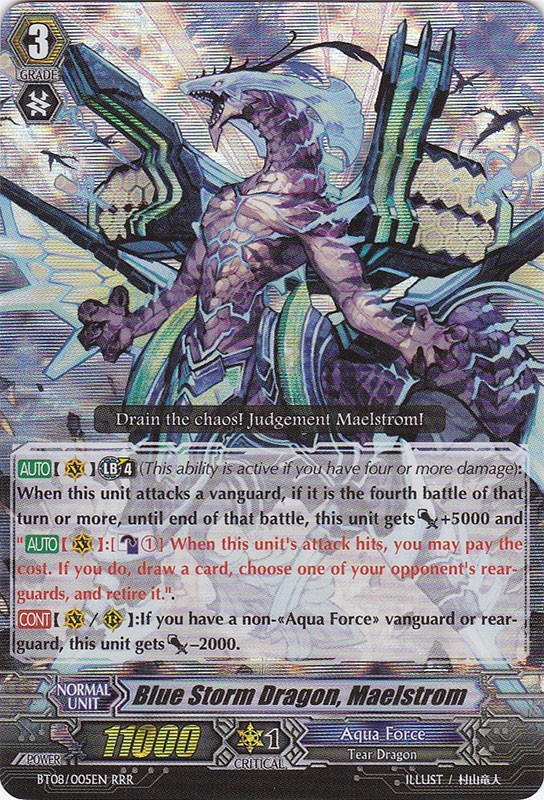
[AUTO](VC) Limit Break 4 (This ability is active if you have four or more damage):When this unit attacks a vanguard, if it is the fourth battle of that turn or more, until end of that battle, this unit gets [Power]+5000 and "[AUTO](VC):[Counter Blast (1)] When this unit's attack hits, you may pay the cost. If you do, draw a card, choose one of your opponent's rear-guards, and retire it.".
[CONT](VC/RC):If you have a non-«Aqua Force» vanguard or rear-guard, this unit gets [Power]-2000.

Blue Storm Karma Dragon, Maelstrom "Яeverse"

[AUTO](VC) Limit Break 4 (This ability is active if you have four or more damage):[Counter Blast (1) & Choose one of your rear-guards, [Rest] it, and lock it] When this unit attacks a vanguard, if it is the fourth battle of that turn or more, you may pay the cost. If you do, until end of that battle, this unit gets [Power]+5000/[Critical]+1 and "[AUTO](VC): At the end of the battle that this unit attacked, if the attack did not hit during that battle, draw a card, choose one of your opponent's rear-guards, and retire it.". (The locked card is turned face down, and cannot do anything. It turns face up at the end of the owner's turn.)
[CONT](VC): If you have a card named "Blue Storm Dragon, Maelstrom" in your soul, this unit gets [Power]+2000.
[CONT](VC/RC): Lord (If you have a unit without a same clan as this unit, this unit cannot attack)

Grade 0

Officer Cadet, Erikk
4 Angler Soldier of the Blue Storm Fleet
4 Blue Storm Soldier, Missile Trooper
4 Supersonic Sailor
4 Blue Storm Soldier, Kitchen Sailor

Grade 1

4 Blue Storm Battle Princess, Electra
4 Shortfin Mako Soldier of Blue Storm Armada
3 Blue Storm Marine General, Hermes
3 Wheel Assault

Grade 2

4 Tidal Assault
3 Blue Storm Marine General, Gregorios
3 Blue Storm Marine General, Spyros

Grade 3

3 Blue Storm Marine General, Demetrius
3 Blue Storm Dragon, Maelstrom
3 Blue Storm Karma Dragon, Maelstrom "Яeverse"

Thanks to Shortfin Mako Soldier of Blue Storm Armada, any and all of this deck's Limit Break 4 abilities can activate early, allowing for quick pressure from their abilities. Each possesses an effect to draw and retire units if it's the fourth attack of the turn, increasing defenses and disrupting the opponents' field. Maelstrom's effect is especially useful early game because its on-hit requirement occurs at a time when the opponent has fewer resources to guard with, and doesn't require a heavy commitment to Counterblast. Demetrius, as the break ride of the deck, helps immensely with mid-game to late-game pushes as its draw and retire only require the Vanguard attack fourth, regardless of whether it hits or misses. Finally, Maelstrom "Яeverse" adds critical pressure and threatens with field disruption should its attack be guarded, creating a lose-lose situation.

However, all three of these Aqua Force Vanguards require the fourth attack, so most of the deck is tailored towards achieving that goal. Spyros and Tidal Assault stand themselves after attacking, and Wheel Assault swaps units' positions to allow for more attacks. This gives a multitude of options to obtain that fourth attack, and if the situation arises where there are multiple options to gain the fourth attack, the deck can simply use the cheaper option if possible, or if "Яeverse" is the Vanguard, locking the standing unit for its skill instead.

The deck presents many different options to utilize its Grade 3 units. If Maelstrom and "Яeverse" are both available, a crossride can be formed, and if Demetrius is available, break riding either becomes an easy option, either riding it on Maelstrom for a super-powerful "Яeverse" next turn, or riding Maelstrom on it and crossriding the next. Because of the usefulness of Demetrius, Officer Cadet Erikk was chosen over Blue Storm Cadet Marios, which adds on-hit pressure and gains more opportunities to search for Maelstrom and "Яeverse", to gain extra chances of obtaining Demetrius or another Grade 3.

An ideal trigger lineup for the deck involves a good mix of Critical and Stand triggers. Critical triggers push the opponent towards 6 damage very quickly, and Stand triggers add extra pressure after the Vanguard because most units will be at rest by the time the Vanguard attacks, preventing wasted triggers when it is completely blocked. This deck specifically uses 8 critical and 4 stand, which aims to maximize the number of Blue Storm units so Spyros' especial Counterblast can be used, and also allows for the use of 4 Supersonic Soldier, which flips damage face-up to allow other units to use their skills more often, especially the Vanguard's.

Saturday, September 27, 2014

Overlord Vague

Hey everyone Natsu here back with another deck profile and this week I'm going to be focusing on my new Kagero deck that I built after set 15, and it's a little... different.  But it still works really well and let's us use both of Kagero's big cards and give our Vanguard some heavy pressure.

Grade 0
Red Pulse Dracokid
Blue Ray Dracokid x4 (Crit)
Embodiment of Spear, Tahr x4 (Crit)
Dragon Dancer, Babara x4 (Heal)
Gattling Claw Dragon x4 (Draw)

So for this build I chose to run Red Pulse as my starter since this build runs Overlord AND Vague so I only have 6 grade 3s so it can help get that extra grade if you're missing it.  The rest of my choices are pretty standard for this deck type and I chose to use Gattling Claw over the Seal Dragon trigger for retiring pesky starters.

Grade 1
Demonic Dragon Mage, Kimnara x4
Dragon Dancer, Maria x4 (Perfect Guard)
Eternal Bringer Griffon x3
Lizard Soldier, Grom x2
Nouvelle Roman Dragon x2

For the grade 1s we run 4 Kimnara to retire any annoying or critical grade 1s such as Palladium, Ballan and Dorint.  Then we also run Griffon in order to grab our Overlords in order to help ensure that we can get the breakride off as this deck is more about attacking with enough force to make your opponent run out of guard.  We then round out the grade 1s with Grom to help unflip your counterblasts (which you'll be using A LOT of) and Nouvelle Roman for grade security.  Meeting Grom's cost shouldn't be an issue unless you end up using Nouvelle Vague's ability but if you do you should've generated enough advantage off the +5 to not need to retire much anymore.
 

Grade 2
Dragonic Burnout x4
Belicosity Dragon x3
Burning Horn Dragon x3

For the grade 2s we run 4 Dragonic Burnouts who can soulblast 1 and place an Overlord on the bottom of your deck to retire any unit.  This is the main eater of your soul and your other main source of retiring.  Then we also run 3 Belicosity in order to apply rear guard pressure and also as your ideal grade 2 ride, also if it hits you can unflip a damage although usually if you're running low on counterblast cost Grom takes care of it.  Lastly we run 3 Burning Horn Dragon, Nouvelle is mainly there to be a finisher and he can make Grom's bad numbers issue go away since we're now back to an 11k meta and make 17k columns.

Grade 3
Dragonic Overlord x3
Dragonic Overlord The Re-Birth x3


For our grade 3s we run 3 of each Overlord (the breakride version of course) and Re-Birth.  If possible you want to always ride Overlord first and then continue to keep riding more Overlords in order to apply as much Vanguard pressure as possible while wearing down their defenses, while using Re-Birth as a finisher.  The deck in that sense runs similar to Thing Saver where you want to finish them off with the effect, using your own judgement for when the appropriate time is key but USUALLY if their hand is at 5/6 or less you can likely finish them off that turn provided they don't have a perfect guard or two in their hand.

Grade 4
Transcendence Dragon, Dragonic Nouvelle Vague x2

Then lastly we run 2 Nouvelle Vague, like Re-Birth he's just there mainly as an extra finisher in case you end up sending most of your Re-Birth's to the drop zone/bottom of your deck.  While he doesn't have the multiple attacks the way Re-Birth does he still makes a strong push during the breakride turn by taking the option of using grade 0s away and thanks to the +10k from breakriding him your opponent if they aren't using a perfect guard need to use an extra 2 cards from their hand to guard him also assuming that you don't get triggers, not to mention the threat of making your opponent getting their field nuked AND negating triggers on their turn.

Overall this is a VERY powerful deck although it can be difficult to learn for someone newer to the game or even to Kagero.  A key thing to remember when playing this deck is to retire the units that are key to the opponent's deck as well as knowing when to make that big game winning push.